Tropical Fruit Cake

There’s something quite brilliant about a fresh pineapple don’t you think? I don’t really know what exactly it is that attracts me so much, it could be the smell or the texture, it could be the fact that they just taste so much better than their tinned counterparts or perhaps it could just be that it’s a ridiculous shape and I always think it would look good as a hat, but whatever it is I do love them. When we saw them recently in our not-so-local supermarket at a price I deemed acceptable it was soon whisked from the ‘panier des fruit exotique’ and into my trolley. As I was already in the area of ‘exotique’ i felt it would be rude not to pick up a mango or two as well.

Of course when it got home it took pride of place in the fruit bowl and did little else but preen itself in front of the non-exotic fruit in the bowl for a few days until I finally hacked it open and small one and I devoured half of it in one sitting. Our needs sated for the moment the rest of it was consigned to the fridge to await it’s fate.

Once more my thoughts turned to cake, as they often do, and the immediate thought was for a ‘gâteau d’ananas inverse’* , but I’ve made quite a few of those recently and delicious as they are I was hankering for something a little…..different. A quick reconnoiter of the fruit bowl showed me a couple of bananas that should have been eaten already, a solitary orange and the as yet untouched mango. Game on 🙂

*pineapple upside-down cake sounds so much more elegant in French.

Apologies about the quality of pictures for this post. Out of necessity ( I’d temporarily misplaced my camera…) they were taken on the iPad and they are a little on the dark side.

Tropical Fruit Cake

85g Butter ( softened )
120g Sugar
1 medium Egg
300g Flour
2tsp Baking Powder
2 ripe Bananas
100ml Creme Fraiche
1 Orange
1 Mango
100g Pineapple
50-100g Icing sugar ( for glaze )

Cream together butter and sugar until pale and fluffy, then beat in 1 egg.
Gradually fold in the flour and baking powder until combined.

20121026-155353.jpg

In a separate bowl mash the 2 bananas and stir in the creme fraiche. Grate in the rind of 1 orange, then chop in half scoop out the flesh and add to the ‘wet’ bowl.
This is not the easiest thing in the world to do, but if possible separate the flesh from the segment skin, as this can give a bitter taste and it’s just not that pleasant to chew. Put aside the other half of the orange for later.
Peel and chop the mango- again not the easiest thing to do as I still haven’t found a satisfactory kitchen gadget to peel and stone a squishy mango and it always gets very messy! I try and peel it over the ‘wet’ bowl so any escaping juice gets into the cake mix rather than wasted.
Next finely dice the pineapple, add to the bowl and mix well.

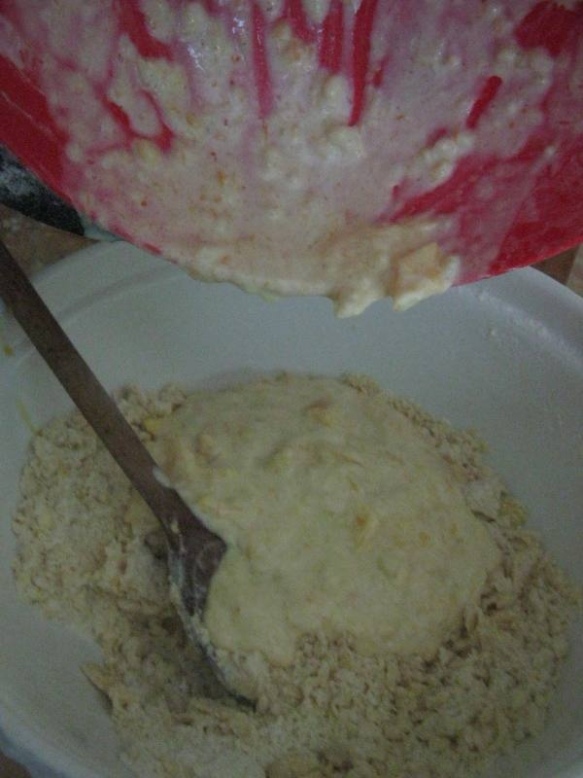
When the ‘wet’ bowl is well mixed, add it to the large bowl and stir until the mixture is fully combined.

20121026-155545.jpg

Grease and line an …… Cm square tin and pour the batter in and allow to settle for a few minutes before covering with baking paper (for the first 45 minutes of baking time) and placing in an oven preheated to 170 degrees.

20121026-155737.jpg

The cooking time on this cake is a around an hour. You don’t want the cake to be completely dry in the middle when cooked as it’s the moisture that really develops the flavours after you take it out of the oven. Conversely you don’t want it to be too runny either…. At around about the hour mark poke a wooden skewer into the centr of the cake and pull it out. You should feel a certain amount of cling when you pull it out, but there should be no mixture left on the skewer. That’s when you take it out and rest it in the tin for 5 minutes, while you mix up the glaze.

For the glaze you will need the juice from the other half of your orange and combine with the icing sugar. I’ve been a little woolly about the amount of icing sugar you will need for this for a couple of reasons as it largely depends on the size of orange you have and the amount of juice you can get out of it. The glaze needs to be translucent and runny so it can be poured over the top of the cake while it’s still warm. (The other reason is that I was making it whilst chatting to a friend and completely forgot to measure the amount.)

20121026-155832.jpg

After about 20 minutes remove the cake from the tin and allow to cool completely. Now whilst the great temptation is to eat it straight away I would strongly recommend leaving it overnight before cutting in as the taste of the fruit develops when allowed to sit for a while. In fact the longer you can leave it the better as the individual flavours come into their own over the course of a few days.

This is a very heavy, dense rich fruit cake which will last for up to a week if stored in an an airtight container, wrapped in greaseproof paper, between nibbles.

20121026-155920.jpg

A Bientôt.

Oatmeal Apple Biscakes

Well I have to start this post with an apology. I’m sorry there has been such a gap between posts, we have suspended all but essential kitchen activity over the last week or so due to the appearance of a small battalion of hungry mice. The necessary upheaval has take quite a toll on my baking efforts ( that combined with a weekend trip to Barcelona to celebrate my best friends birthday has left little time to bake and post). The ‘squeaky situation’ is ongoing, but we are hopeful that our efforts will soon reap the required results.

So finally, it’s time for the recipe……

Whenever I make porridge I always make too much. With the best of intentions I pot up the remainder and pop it in the fridge intending to use it the very next day. I never do.

That said, this time I actually did.

I took a fancy for some thing biscuitty to go with my afternoon coffee, but there was nothing in the cupboard that fitted the bill so it was on with the apron.

Honey, Apple and Oatmeal Biscakes
(because they are not exactly biscuits and not exactly cakes)

250g of flour
1 tsp baking powder
125g of Butter
125g of Sugar
1 Egg ( beaten )
100g pre cooked Porridge
1 tbsp Clear Honey
1 Apple.
50g of Oats ( to roll biscuit dough in )
Mix together flour and baking powder then rub in the butter. ( It’s far easier and quicker to do this in a food processor ).

Stir in the sugar then add the beaten egg and mix well.

It’s now time to add your cold porridge to the mixture.

Now the debate rages ( in certain households of my acquaintance ) as to the perfect consistency for porridge and this is not a debate which I intend to enter into here. But what I will say is this ; Thick but pourable. If your your porridge is too wet you will need to add more dried oatmeal or your biscuit dough will be too runny, if it’s too dry your dough will not not be elastic enough so you will need to add a little milk.

Mix apples with the dough

Put a tablespoon of clear honey in a small bowl. Core, peel and finely dice your apple and add to the honey. Stir well to coat the apple pieces. Once this is done add the honey and apple to the dough and mix well.

Place the dough in a plastic bag and refrigerate for at least 30 minutes.

This is a very sticky dough so be prepared to get your hands dirty.

sprinkle with sugar

Roll dough into balls about the size of a cherry tomato then roll in dried oats. Place on baking tray and squish down with your hand to flatten them. Sprinkle the tops with white sugar.

Bake in a 170 degree oven for 12- 15 minutes until golden brown on the top. Leave them on the tray for 5 minutes then move to a cooling rack until you can resist no more. 🙂

cool then eat!

A Bientôt

My humble apologies

Sorry there haven’t been any new recipes for a few days, I’ve been up to my elbows in pickling vinegar, which is quite as disgusting as it sounds.

There will be a new post tomorrow that doesn’t involve vinegar of any kind. In fact it’s going to be a scrummy new cake I made last week which has been thoroughly tested for deliciousness 🙂

So now I’m off to try and wash the stench of vinegar from my hair, it may take a little longer to cleanse the house ……

A Bientôt

Potato Nest Quiche

OK so its not the best name I’ve come up with, but its the best I’ve got for this dish.

As you may have already surmised I get quite easily distracted in the kitchen, so when small one requested quiche for dinner things didn’t go exactly to plan. Not that there’s anything wrong with quiche ( unless you happen to be my father who maintains to this day that ‘real men don’t eat quiche’), in fact I love a good quiche and its a bit of a family favourite, but I got a little distracted by all the  potatoes in the cupboard. Then I had an idea……

Potato Nest Quiche

6 large Potatoes

1 Onion

3 eggs

1 large Tomato

200g Lardons ( or chopped bacon )

50g grated Cheese

100ml Crème fraîche

Salt and Pepper to season

Peel, grate and rinse the potatoes, then dry them. Its best if you can do this well in advance to allow the potato to dry out. When I had rinsed them I hung them in a muslin bag for a couple of hours, but if you are a bit pushed for time, place the potato between sheets of kitchen roll and press down firmly to remove as much moisture as you can.

wash and drain potatoes


Beat one egg in a bowl with a pinch of salt and pepper then add 1 onion which has been finely chopped or grated. Add the potatoes to this mixture and stir well.

Grease 6 muffin cases ( you may need a couple more depending on how large your potatoes are ) and firmly press the potato mixture into shape.

Pop these in a pre-heated oven (200 degrees) for 15 – 20 minutes until they begin to brown.

line muffin cases with potato

While your shells are in the oven, lightly fry the lardons or bacon with a chopped tomato.

Beat your 2 remaining eggs with the crémé fraîche and a little seasoning.

lardon, tomatoes, egg and creme fraiche

Take the potato shells out of the oven and turn it down to 170 degrees.  Spoon in the lardon and tomatoes but don’t press them down.. Slowly pour in the egg mixture until the cases are full. ( I say pour slowly as it is VERY easy to overfill the cases and make your clearing up so much messier than it needs to be !)

fill the potato nests

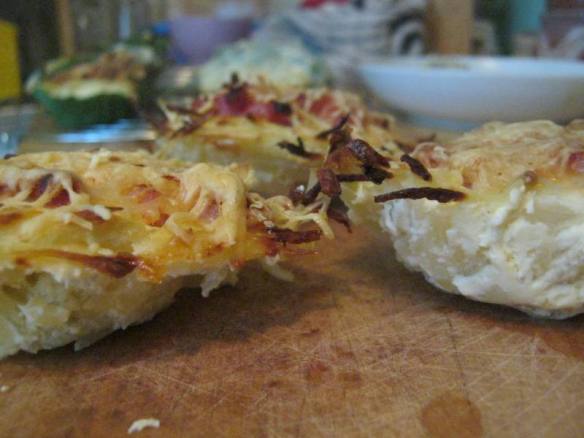
Once the cases are filled sprinkle the tops with cheese and return to the oven for 30-35 minutes until they have risen well and the cheese has formed a light crust.

bake for 30-35 minutes

Remove from the oven and allow to stand for 5 minutes before removing the cases.
These little Quiche-ish-‘s are fantastic warm as part of a main meal, but are also pretty amazing when the are cold and served with a spoon of chutney on the side . Thankfully they gained the small person seal of approval and she has already asked for me to make them again. which will be fine unless I get distracted again….

enjoy!

A Bientôt

Let’s get ready to Crumble*

*sorry I couldn’t resist

Yes I know, more apples. I promise it will be the last one for a while ( not that I’ve finished using them all, I just don’t want you to get bored), but this is a really yummy one, so hopefully you will forgive me.

When I put together the words autumn and apples what immediately comes to my mind is a lovely crumble, preferably with blackberries too. As it was such a beautiful day I took an executive decision to take the family on a bramble-ramble and we had a lovely walk and gathered just enough ( by the pick 2 eat 1 method) to go into a pud.

Toffee Apple Bramble Crumble

Filling;
300g of peeled, cores and diced apples
100g of sugar
200g blackberries
50ml of maple syrup

Put your sugar into a large mixing bowl and chop your apples into it. If you make sure your apple pieces are coated in sugar this will stop them going too brown, and also give them a nice crunch when cooked. Leave them in the bowl while you are making the crumble topping.

Sugared apples and maple syrup

Topping;
200g flour
1tsp of baking powder
75g sugar
100g of porridge oats
25g brown sugar.


Rub together butter, flour and baking powder till a breadcrumb consistency is reached, then stir in the sugar. Add to this your porridge oats and mix well. If you like a chunkier crumble use large oats, if you prefer a smoother topping then use small oats, or give them a whizz in the food processor before mixing.

Stir in a few blackberries

When you are ready to build your crumble, stir 50ml of maple syrup into the apples. Add your blackberries and mix gently so as not to break up the fruit. As soon as the fruit mix is ready, place it into a large oven proof dish till it’s around halfway full.


Tip 2/3 of the crumble mix directly on top of the fruit and press down gently. Pour the rest loosely on top and sprinkle with brown sugar.
Put into the oven ( pre-heated to 180 ) and bake for 35-40 minutes.

Sprinkle with brown sugar


Remove from the oven and allow to stand for around 5-10 minutes. Just enough time to whip up some custard 🙂


I know there is an ongoing debate about custard or cream with crumble, but for me there is nothing quite so perfect as lashings of custard on a hot crumble. That said, if you happen to be having a cold crumble midnight feast then cream is just the thing*.

A Bientôt

Serve with lashings of custard

*Not that I did of course. I’m just imagining it would be perfect. Honest.