Chocolate Lime Macaroons

Well hello there. It’s been a while I know, but I just haven’t been feeling the baking mojo of late. A seemingly endless round of family illness and grotty cold weather had left me feeling rather uninspired.

The good news is that this week the sickness has abated and I’m slowly getting back into the kitchen 🙂

My first post flu cravings were for comfort and sweetness. What better than a coconut macaroon to cheer me up. But, as it’s me in the kitchen, it’s a coconut macaroon with a twist. Of course I turned to chocolate as a first choice, but i thought this might make it a little sickly and there was a little extra something needed to take the edge off so I dabbled with a little lime. The results were just what I needed.

This is a very simple recipe and quite quick to make too. They are ideal as a biscuit replacement with your afternoon cuppa, but pretty enough to be served at a high tea.

Chocolate Lime Macaroons

2 egg whites
100g caster sugar
160g desiccated coconut
Grated zest of 1 lime
Juice of 1/2 a lime ( reserve the rest in case your mixture isn’t quite wet enough)

???????????????????????????????

200g dark chocolate

50ml single cream

Place all of the ingredients into a large bowl and mix together. The best way of doing this is with your hands. It will feel very dry to start with but you really need to squeeze the ingredients till they start to come together. If it’s not pressing together add the reserved lime juice 1 tsp at a time.

???????????????????????????????

Turn out your mixture onto a greaseproof sheet and press it firmly into a square about 1 cm thick.
???????????????????????????????
Take a small cookie cutter and press firmly into the mixture.
???????????????????????????????
Very gently transfer to a lined baking sheet. You will need to be quite delicate when easing the shape out onto the tray as this is a VERY crumbly mixture.

Keep cutting and repressing your mixture until it is all used. I had enough to make 24 hearts.
???????????????????????????????
Place the tray in an oven preheated to 180degrees for 10- 15 minutes, just until the coconut has started to brown.

Remove from the oven and let cool on the tray for 5 minutes to allow them to firm up a little before placing on a wire cooling rack.
???????????????????????????????
When the macaroons are completely cool melt the chocolate and stir in the cream until it is completely blended.
???????????????????????????????
Dip the macaroon in the chocolate ganache and place onto greaseproof paper  until the chocolate is set.
???????????????????????????????
These can now be kept for up to a week, ( if you have a stronger will that I ), in an airtight container.
???????????????????????????????
A Bientôt.

Apple and Ginger Surprise Loaf

What’s the surprise? (I hear you ask)
The surprise is that I made it.
I was actually just in the kitchen making a coffee and bemoaning the lack of biscuits to go with said coffee and my eyes began to wander and before I knew what was happening I had a bowl full of cake mix in front of me.

I was going to knock up a batch of biscuits as cheeky treat, but then I noticed a banana that had seen better days loitering in the fruit bowl trying it’s best to corrupt a lonesome apple and my head decided that the best place for them was inside a cake, rather than have them join forces and ruin what was left of the innocent ginger root. Ah now ginger, that would be nice with apple….

So the mixing began in earnest and i remembered the tin of chrystallised ginger in the cupboard that I’ve been forgetting about for the last 2 months, and when I was rummaging I found a jar if ginger syrup ( left over from the chrystallising ). Then I thought this might actually turn out to be rather awesome and I really should be taking pictures for the blog, but as my camera was in the somewhere, and my iPad was charging in the somewhere else I just decided to crack on before the baking muse decided to join them. It also occurred to me that I should probably be writing this down. And measuring the ingredients rather than just chucking and sloshing.

The following is a recipe of all the things I remember putting in it, in their approximated quantities. And even if I do say so myself it’s rather delicious.

Apple & Ginger loaf.

*75g Butter (softened)
*50g Sugar
1 Egg
*275g Flour
*2 level tsp Baking powder
1 overripe Banana
**75ml Ginger Syrup
**75ml Creme Fraiche
1 Apple (peeled and diced)
**100g Chrystallised Ginger ( finely chopped )

*these ingredients I did measure
**these ingredients I didn’t, but its a good ‘guesstimate’

In a large mixing bowl cream the butter and sugar until pale and smooth.
Beat the egg and stir in gradually, adding a spoonful of flour each time you add some egg to avoid curdling. When all the egg has been stirred in , sift in the rest of the flour and baking powder and stir well.

In a smaller bowl mash the banana and mix with the ginger syrup and creme fraiche, then add this to your large bowl and stir well. The mixture should be slightly ‘gloopy’ in consistency, but not quite pourable. If it is too dry at this point add a little more creme fraiche. Now throw in the chopped apple and chrystallised ginger and mix thoroughly.

Transfer the mixture to a 2lb greased and lined loaf tin, cover the top loosely with greaseproof paper and place in an oven preheated to 170degrees. Bake for 1 hr and 15 minutes then uncover and return to the oven for 15-20 minutes. Poke a skewer or knife into the centre of the cake and if it comes out clean then it’s done. If not return to the oven for a further 10-15 minutes ( you may need to recover the top to stop it getting singed).

20130221-225841.jpg

Take out of the oven and leave in the tin for 15 minutes, then remove it, take off the lining paper and leave on a cooling rack for as long as you can. The longer you leave it too cool, the easier it is to slice, but if you are impatient like I am, warm chunks are more than acceptable.

20130221-225942.jpg

A Bientôt.
Marvellous Moreish Muffins

I haven’t actually been in the kitchen very much of late as my lovely hubby has been cooking up a succession of delicious curries and Thai dishes for us, I’m hoping he’ll guest spot here one day with his fabulous spicy pork salad but up till now he can’t be persuaded.

That said I have been allowed in to make the odd dessert or two and I have found one of the simplest and most reliable muffin recipe I’ve ever used. And this is what I’m going to share today. This is a quick bake too- no more than 30 minutes start to finish.

This is so simple and delicious that it’s great for novice bakers, kids and old hands alike, and the variety of flavours are as limitless as your imagination!

I will start by giving the plain muffin mix recipe and method then go through a few variations after. These ingredients are enough for 6 large muffins. If you happen to have run out of muffin cases then it works just as well in cupcake cases and you will get 10 ( guess how I found that out!)

Marvellous Moreish Muffins.

In a Bowl

150g Plain Flour
1tsp baking powder

In a large Jug

1 egg
60g sugar
2tbsp oil
100ml milk
1/2 tsp vanilla essence
ingredients (Now for the chocoholics amongst us if you want to make chocolate sponge as well, simply replace 25g of your flour with cocoa powder)
Mix the egg,milk, oil and sugar together in the jug.

Pour the egg mixture into the bowl gradually and mix until combined *
IMG_3232
Spoon mixture into cake cases and put the tray in the oven at 160C for 20 until set and cracked at the top if not quite set put back in for a further 5-10 mins
So the plain muffins are delicious, but they are well, plain so let’s have some fun!

*Just before you spoon the mixture into the cups is a great time to start being creative. You can add just about anything here, chunks of fruit, chocolate, nuts or combinations of all 3 of those things. I have found that around 100g of ‘extras’ is about right, but if you are adding things like oats or desiccated coconut you may need a tiny bit more milk as they will absorb some of the moisture in your mix.
IMG_3233
(Now for the chocoholics amongst us if you want to make chocolate sponge as well, simply replace 25g of your flour with cocoa powder)

Here are a few flavours I’ve already tried;
Oatmeal honey and raisin
Apple and cinnamon
Chocolate chunk
Chocolate cranberry and coconut.
Marvellous Moreish Muffins
I’m quite sure I’ll be making more, I’m already tempted for a chocolate and orange, but do let me know what flavours are your favourite.

A Bientôt

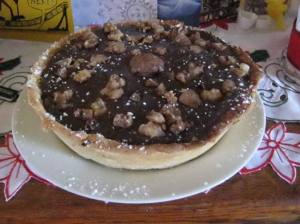
Chocolate Chestnut Chili Torte

I had this idea a while ago and thought it would be a most excellent dessert for christmas.  I’ve been  Waiting ever since. Amidst all the preparations all I could think about was finally getting to make (and more importantly, eat) my pud, and hope it was as nice as I thought it was going to be.

Well the waiting is over and I can assure you it was most definitely worth the wait 🙂

There are a few flavours in here, but they complement each other wonderfully well.

Chocolate Chestnut Chilli Torte

  Chilli Pastry

200g Flour
100g Butter (diced)
50g Chilli sugar*
1 Egg (beaten)
Icing sugar to roll out pastry and sprinkle.
(* if you don’t have any chilli sugar there is a method here, or you can add 1tsp of chilli flakes and 1/4tsp of chilli powder to regular granulated sugar)
 Chocolate torte

200g Dark Chocolate

100ml Cream

100g Marzipan

50g Chestnut paste

7 whole cooked Chestnuts

Icing sugar to dust

Cut together the butter and flour until there are no large lumps left. I have this nifty little pastry cutter gadget, but a knife works just as well, but a bit slower. Finish by rubbing the flour and butter through your fingers until the mixture looks like sand. Add the sugar and mix well.

Gradually add the beaten egg and bring together with a fork. You only really need a few spoonfuls of the egg s you don’t want your pastry too wet. When it starts to go sticky on your fork use your hands to bring the dough together into a ball. If its too dry add a little more egg, if it’s too wet add a little more flour.

Kneed well until smooth and crack free, place in a polythene bag and refrigerate for at least half an hour before rolling.
roll out pastry to 1/2cm
Once the pastry is chilled roll out to about 1/2cm thick. You will need the pastry to be relatively thick as there is a point with this torte when you will be using your hands and you don’t want it to fall apart when you pick it up.
Press gently into a greased and floured tin and blind bake* for 25 minutes.

*To ‘blind bake’ you need to cover the uncooked pastry with a sheet of baking paper and weight it down with pastry beads or uncooked rice and place in a pre-heated 180degree oven.
cover and blind bake pastry
Take the pastry from the oven when it has started to brown around the edges and allow to cool completely. When it is completely cold remove the beads/rice and paper .
baking rice
Roll out marzipan to about 1/4cm and line the pastry shell.
Spread a generous layer of chestnut puree on top of the marzipan.
The reason for the marzipan, should one be needed, is to stop the chestnut puree soaking into the pastry and making it soggy. And it tastes fantastic.

chestnut paste

Place the dark chocolate in a bowl over boiling water and when it has melted stir in the cream. It takes a few minutes for the cream and chocolate to combine so stir gently until the mixture is smoothe dark and runny.

heat chocolate and cream

Take from the heat and stand for 5 minutes before pouring into the pastry shell.
???????????????????????????????
Now you have to be patient. Set aside to cool for an hour and when the top of the ganache is set arrange your chestnut pieces gently on top. Now leave the torte to cool completely either in a cool place overnight or in the fridge for a few hours.
???????????????????????????????
When the torte is solid, you are free to enjoy 🙂

I would recommend serving with a little cream or creme fraiche. The pastry is not overly hot and the chocolate ganache complements the hint of chili without ambushing it completely. But in the wise words of small person “don’t eat the pastry on its own…get me some water”!

???????????????????????????????

A Bientot.

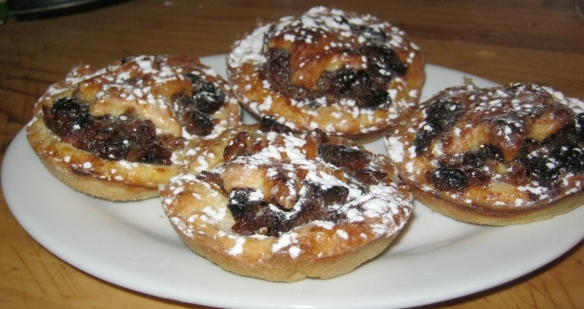
Cinnamince PIes

Cinnamince Pie

Mmmmmm Mince Pies

I’m just putting it out there; I LOVE mince pies.

One of the best things for me about the build up to Christmas is the smell of mincemeat gently bubbling inside a crispy pastry shell. Oh just thinking about it makes me want to sing carols and stuff my face with pies – not at the same time obviously, that would be gross.

For anyone who doesn’t know what I’m talking about,  the humble mince pie is a singularly British concoction that starts to appear around mid-November, hangs around for the festive season then disappears for the rest of the year. It is a small sweet pastry shell filled,  not with minced-meat, but with mincemeat. I hope that’s cleared that up.

I’ve been making my own mincemeat filling for a few years now, as it tastes so much better than shop bought,  and of course you can monkey around with it till it tastes just how you like it .Home-made mincemeat is VERY easy to make, but rather time consuming so its best to prepare it reasonably well in advance. The joy of this is that when it comes to actually making the pies, it takes a matter of seconds to fill the pastry cases.

You also get to monkey around with the pastry shell. Some people favour puff pastry, but my preference is definitely shortcrust and of all the different types I’ve tried out, my absolute favourite for mince pies is sweet cinnamon pastry.

This is my favourite mince pie combination to date, I hope you enjoy.

Mincemeat
(can be made up to 3 months in advance… definitely jar it and  leave it overnight before baking. This recipe makes around 1kg.)

200g Apples ( peeled cored and finely diced)
100g shredded suet
175g raisins

100g sultanas

100g currants

175g Brown sugar

1 Orange ( rind and Juice)

1 Lemon ( rind and juice)

2 tsp mixed spice

½tsp Cinnamon

½ tsp ground nutmeg

4 tsp Armagnac

4tsp Amaretto

add juice to fruit and nutsSimply put all of the ingredients, except the brandy and amaretto, into a large bowl, mix well and leave covered with a cloth for at least 12 hours.

place in an ovenproof dish and bakeStir the mixture well and place in a large dish and bake at 120 degrees for 2- 2&1/2 hours ( dont let it get too dry).

Take it out of the oven and allow to cool completely.

jar and top with greasproof paperOnce cooled stir in the brandy and amaretto and spoon into sterilised jars. Top with greaseproof paper and seal jars.

Cinnamon pastry

200g Flour
100g Butter (diced)
50g Cinnamon sugar*
1 Egg (beaten)
Icing sugar to roll out pastry and dust finished pies. .
(* if you don’t have any cinnamon sugar there is a method here, or you can add 1/4tsp ground cinnamon to regular granulated sugar)

ingredientsCut together the butter and flour until there are no large lumps left. I have this nifty little pastry blender gadget, but a knife works just as well, but a bit slower. Finish by rubbing the flour and butter through your fingers until the mixture looks like sand.

blend pasrtyAdd the sugar and mix well.

Gradually add the beaten egg and bring together with a fork. You only really need a few spoonfuls of the egg as you don’t want your pastry too wet. When it starts to go sticky on your fork use your hands to bring the dough together into a ball. If its too dry add a little more egg, if it’s too wet add a little more flour. (reserve the remaining egg to brush the pastry).

gradually add egg

Kneed well until smooth and crack free, place in a polythene bag and refrigerate for at least half an hour before rolling.

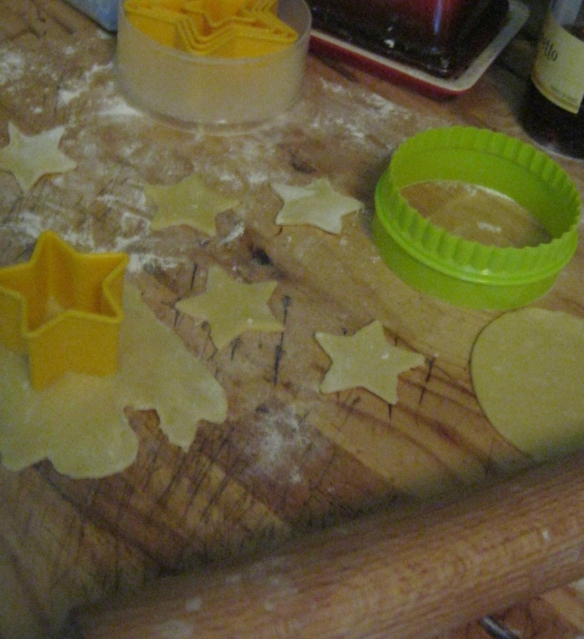
ball pasrty dough, then refrigerateWhen your Pastry is cold and a little stiff, sprinkle your work surface with icing sugar and roll out to desired thickness ( I like about 1/4cm). Cut a large circle and a star for each pie.

roll and cut pastryGrease and flour your baking tin ( I prefer to use a deep tin as this tends to minimise spillage from over boiling in the oven), lightly place your pastry circle into the tin then spoonabout 1&1/2 to 2 tsp of mincemeat into each case. Gently place your star on top and brush with beaten egg.

fill and top piescook  in a 200 degree oven for 20-25 minutes until golden brow. Remove to a wire tray and allow to cool for 5 to 10  minutes.

Cinnamince PiesWhen still warm, dust with icing sugar and eat immediately. You’ve waited long enough 🙂

You can serve with cream or crémé fraîche and i can assure you that they are just as tasty cold ( if they make it that far)

A Bientôt.

Chocolate , Chocolate, Chocolate and Beetroot cake

Yes you read that right beetroot. But more of that later….

As regular readers and friends will already know Small Person has very recently reached the grand old age of 8. As is tradition here on her ‘actual’ birthday it is custom to bring in a cake for the school to share ( this is not as daunting as it sounds as in the whole school  there is a grand total of 20 people). When I picked her up on Tuesday afternoon the teacher confirmed that there would indeed be a cake on Friday, I told her yes of course there would be, then she leaned over to me and asked me if it was at all possible that I could make the same cake as I had made last year as she had really enjoyed it. I was, of course, thrilled that she had enjoyed it so much and whilst I reassured her I would do my best I was also a little concerned as I knew for a fact that I made up the recipe for it and didn’t write it down.

I knew vaguely what it was and that involved lots of chocolate and grated pumpkin, ( we were give a 17 kg pumpkin last year by a friend and I was desperate to find things to do with it ), but other than that I was at a bit of a loss. In any case as we had not received a massive pumpkin gift this year I resolved to go to the supermarket on Thursday and purchase a pumpkin to use for the cake.

Of course you know that when i got there, there was not a pumpkin to be seen. So what was I to do. I could just make a normal chocolate cake, that’s what I could do.

Yeah right.

As I was gathering my ingredients my eyes strayed to the vegetable shelf and  came to rest on a vacuum pack of natural beetroot and my my mind decide that this would be a great idea…… And I’m happy to say that despite Hubby’s “I’ve married a mad person” look, it was.

The Beetroot gives a very subtle flavour in the the midst of the chocolate kick and helps to keep the cake super moist.

Chocolate, Chocolate, Chocolate and Beetroot cake

75g unsalted Butter (softened)

100g Sugar

1 medium Egg (beaten)

225g Flour

50g Cocoa powder

3tsp Baking powder

1 Banana

50g Natural (un-pickled) Beetroot

100ml Crémé fraîche

75g Dark chocolate (roughly chopped)


Begin by creaming together the softened butter and sugar and beat till pale and fluffy.

Gradually beat in the egg adding a tsp of flour with each addition to avoid curdling.

Sieve the remaining flour cocoa powder and baking powder into the bowl and fold in gently using a metal spoon.

In a separate bowl mash the banana, grate the beetroot and mix well with the crémé fraîche .

Add the ‘wet’ ingredients to the ‘dry’ bowl and beat together.

Finally add the roughly chopped chocolate and give it one last stir before pouring the mixture into a greased and lined baking tin.

Cover the top of the cake with baking paper, pressing lightly on the surface ( this should ensure a nice flat top), and place in a pre-heated oven at 180 degrees for 45 minutes. Carefully remove the baking paper after 25 minutes of baking.

Allow the cake to cool in the tin for 10 minutes before removing to a wire rack to cook completely.

Now, these quantities will give you one large square cake, but as I was showing off a bit I made double the quantity so I could sandwich them together with chocolate ganache and smother it in yet more chocolate before plonking a solid dark chocolate birthday star on top and round it of with some white chocolate butter cream swirls! Well it was her birthday.

As I knew there was absolutely zero chance of Hubby and I getting a sniff of the cake, i used a tiny bit of the mixture to make a cupcake size tester (well you HAVE to try these things….) and it was simply delicious and extremely indulgent. 🙂


I’m very happy to report that when I went to pick up Small Person from school there was not a single crumb left and lots of children with chocolaty smiles. Thats all you can ask for really.

A Bientôt


Lavender & Lemon loaf lovliness

WOOHOO! The gods of wordpress are smiling and I have managed to retrieve my ‘lost in the ether’ post, which I am very pleased about . So here it is for your delight and delectation. Hopefully you will like it as much as we did 🙂

It was around 2 am when I decided that I was going to make a cake later that day. Despite persistent questioning and speculation from Hubby, I had no idea what said cake would be, but I had a feeling it was going to be something new. You see I love mucking around with food. Once I have found a basic recipe I like and that gets consistent results, I mess with it and start adding different flavours and textures and see what happens.

Of course the more you muck about, the more things you discover, and the more your family think you are slightly deranged. So when I announced that I would be making Lavender & Lemon loaf this afternoon the reaction was neither surprised nor terribly enthusiastic. ( If any of you have seen the Peter Kaye ‘garlic bread’ sketch, well, that.).

I was led to this by a link that a friend had posted on Facebook of a lovely looking lavender cake, but when I read through the recipe I thought it would have been a little too delicate in flavour for the kind of thing I was after, so I had a bit of a tinker and this is what I came up with.

Lavender & Lemon loaf.

150 ml of milk
2 heaped teaspoons of lavender
The zest of 1 lemon

Put the milk in a small pan on a low heat and crush the lavender into the milk.  Add the grated lemon zest and gently warm the milk for a few minutes, but be careful not to let it boil. Then allow to cool.
lavender and lemon zest in milk
100g of unsalted butter
50g of sugar
50g of Lavender sugar*
2 eggs
200g of flour
1 & 1/2 teaspoons of baking powder
1/4 of a teaspoon of salt
1 lemon

Cream together the butter and sugar till pale and fluffy ( a much easier task since I got my food processor ), beat the eggs in one at a time until a batter consistency is reached.

In a separate bowl combine the flour, baking powder and salt.

Stir in 1/3 of the flour, then add 1/3 of the cooled milk.
Do this 2 more times until all the ingredients are mixed.
This is a very runny cake mixture, so don’t panic if it looks a little wet at this stage. ( I only panicked a little bit, but it worked out fine in the end)

pouring batter
Now chop 1/2 the lemon into tiny pieces and stir into the mixture. (Try and get rid of as much rind and skin as possible as it’s just the flesh of the fruit you really need).

Pour mixture into a pre lined loaf tin and place in a 180degree oven for 50 minutes.
Place a loose sheet of baking paper on the top of your loaf tin for the first 30 minutes of cooking time, then remove for the remainder.

lemon drizzle icing
Remove the loaf tin form the oven and let stand for 10 minutes before cooling on a rack.
Combine 100g icing sugar with the juice of up to 1/2 a lemon (depending on the thickness of icing you want) and drizzle over the loaf.
Using every fibre of resistance in your being allow to cool completely before slicing it up and serving with a lovely cuppa.

*If you don’t have lavender sugar just substitute with regular sugar.

I hope you enjoy this as much as I did, it was so nice I might actually make it again without mucking around with it… maybe…..

Lemony lavender lovliness

A Bientôt